Easy Oval Cottage Rug – Step‑by‑Step Crochet Tutorial for Beginners
Easy Oval Cottage Rug Crochet Tutorial - Step-by-Step Pattern for Beginners
Learn How to Crochet a Beautiful Oval Rug from Scratch Using Half Double Crochet
An oval cottage rug is a great beginner project that looks impressive but uses very simple stitches. This tutorial walks through each step to crochet an oval rug from the center outward, so you can make it smaller for a bedside rug or larger for an entryway, hallway, or kitchen. The method is based on an easy pattern that uses half double crochet stitches in the round and regular increases at each end to form the oval shape.
Materials and Gauge
Before starting, gather everything you need so you can crochet without interruptions.
- Yarn: A sturdy, medium‑weight yarn (the original uses a cotton or cotton‑blend rug yarn).
- Hook: The hook size recommended on the yarn label or the size used in the video (often around 6 mm to 6.5 mm for rug yarn).
- Notions: Yarn needle for weaving ends, scissors, and optional stitch markers.
Gauge in the original project is about 6 stitches and 5 rounds of half double crochet (hdc) in 4 inches, but for a rug, exact gauge is not critical; it mainly affects the final size and thickness.
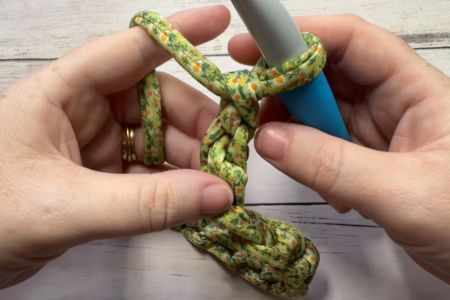
Step 1: Start the Center of the Oval
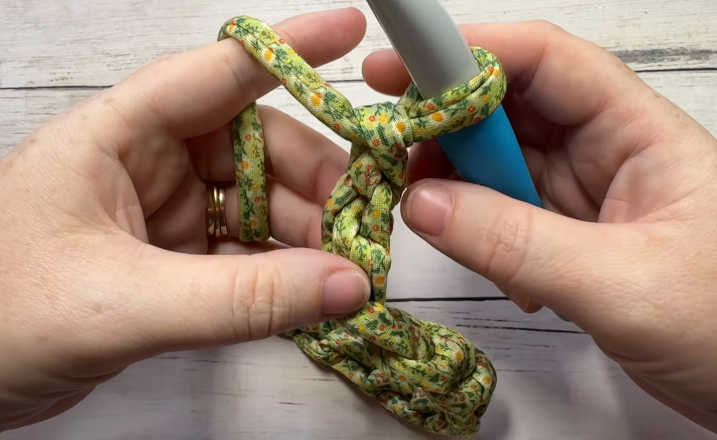
Step 1
The rug is worked from the center outward, which makes it easy to adjust length and width later.
- Chain a short foundation
- Make a slip knot and chain several stitches (for example, 10 chains) to form the initial straight center of the oval.
- This chain defines the width of the center strip before the rounding begins at each end.
- Work along the chain
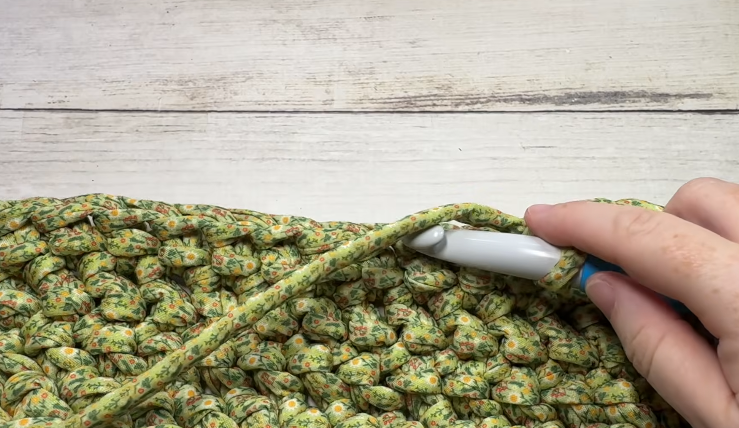
- Starting in the second chain from the hook, work one half double crochet (hdc) into each chain across until you reach the last chain.
- This creates a narrow rectangle that will become the inner “spine” of your oval.
- Turn the corner
- When you reach the last chain, work multiple hdc stitches into that last chain (commonly 3 or more stitches in the same chain) to begin curving around the end.
- Do not turn your work; continue along the other side of the starting chain.
Question for you: based on this step, can you explain in your own words why you put several stitches into the last chain instead of just one?
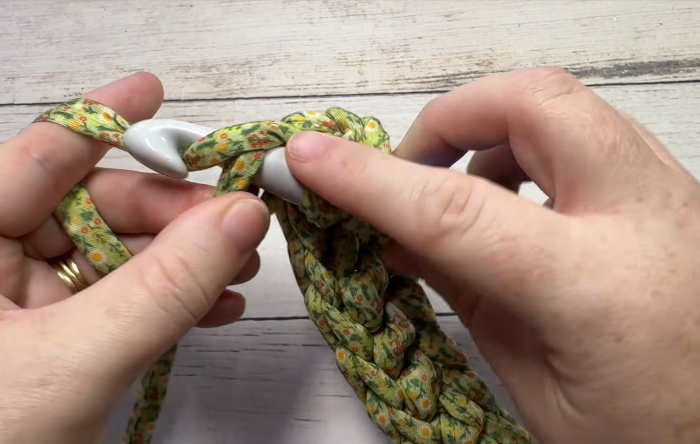
Step 2: Crochet Around to Form the First Oval Round
Step 2
Now you will work down the opposite side of the chain to complete the first oval round.
- Work along the underside of the chain
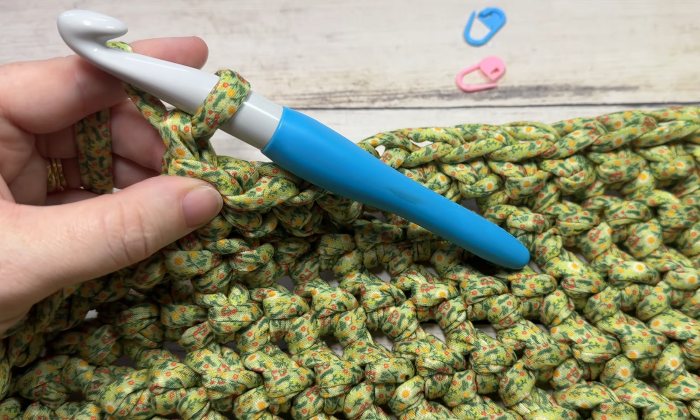
- After turning the corner with multiple hdc in the last chain, insert your hook into the remaining loops of each chain on the other side and work one hdc into each.
- This mirrors the first side and keeps the center section straight.
- Create the second rounded end
- When you reach the very first chain where you started, work multiple hdc stitches into that stitch as well to round the second end of the oval.
- Place a stitch marker at the first stitch of the round if you want to keep track more easily.
- Join the round
- Join with a slip stitch into the first hdc of the round to close your oval and complete Round 1.
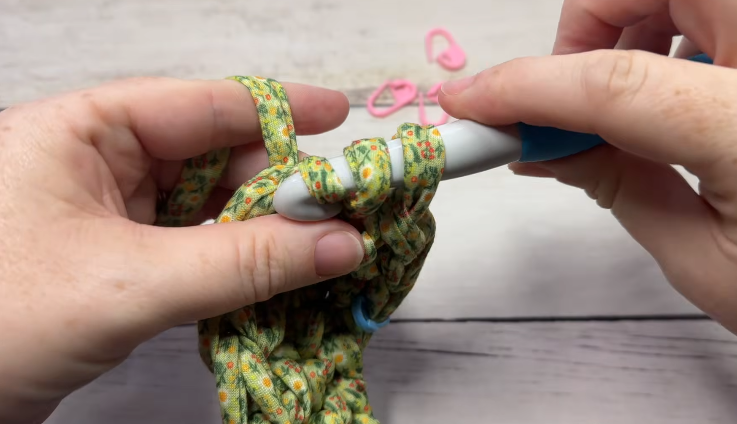
Step 3: Build the Oval with Repeated Rounds
step 3
Each new round follows the same idea: straight sides with regular increases at the ends to keep the oval shape flat.
- Start the new round
- Chain 1 to begin. This chain does not count as a stitch; it just gives height for the half double crochets.
- Work the straight sides
- Work one hdc in each stitch along the straight side of the oval.
- The number of stitches here grows as the rug gets bigger, but you always place one stitch in each stitch along the straight edge.
- Increase at the rounded ends
- At the curve (the set of stitches that rounded the ends), you will place increases.
- A typical pattern is to work multiple hdc into some or all of the stitches at each end, evenly spaced, so that the oval lies flat. For example, you might crochet 2 hdc into each stitch around the curve on early rounds, then gradually space out the increases as the oval grows.
- Join to finish the round
- When you complete the round, join with a slip stitch to the first hdc (not to the chain‑1).
- Repeat this process, round after round, always maintaining straight sides and evenly spaced increases at the two ends.
Step 4: Adjusting the Size of Your Rug
step 4
Because the rug is worked from the center outward, adjusting the size is simple.
- To make the rug longer:
- Work more rounds, maintaining the same increase logic at the ends. Each new round adds length and width to the rug.
- To keep the rug flat:
- If the rug starts to ripple, you likely have too many increases; on the next round, reduce the number of increases at each end.
- If it begins to cup or curl up, you need more increases at the ends. Add extra 2‑in‑1 hdc increases around the curve.
The original finished rug is about 22 inches wide and 37 inches long, a good size for a bedside or entryway rug, but you can stop earlier or continue for a much larger piece.
Step 5: Adding a New Ball of Yarn
step 5
For a rug, you will probably use multiple balls of yarn. The video demonstrates a simple way to add a new ball while working.
- Prepare the new yarn
- When you see that your yarn tail is getting short, pause and get your next ball of yarn ready.
- Work until only a short tail remains from the old ball.
- Join the new yarn
- On the last yarn‑over and pull‑through of a stitch, drop the old yarn and yarn‑over with the new yarn to complete that stitch.
- Gently pull both tails snug so the join is firm but not tight.
- Secure and weave in tails
- After a few stitches, you can weave the yarn tails into the back of the rug with a yarn needle or crochet over them for a few stitches to secure.
This joining method keeps the color consistent and avoids knots that can be uncomfortable underfoot.
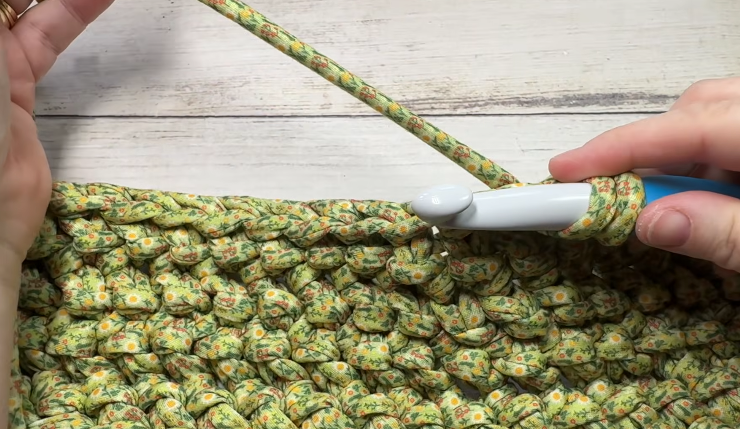
Step 6: Finishing the Rug
step 6
When your rug reaches the desired size and lies flat, you can finish it neatly.
- Final round
- Work one last round of hdc, making sure the stitch count and increases keep the oval smooth. Some crafters like to work a final round of single crochet (sc) to create a slightly firmer edge.
- Fasten off
- At the end of the final round, cut the yarn, leaving a tail of 10–15 cm.
- Pull the tail through the last loop to secure.
- Weave in ends
- Use a yarn needle to weave the yarn tails through the back loops of several stitches in different directions to lock them in place.
- Trim the excess yarn.
- Block if desired
- For natural fibers like cotton, lightly blocking (moistening the rug and laying it flat to dry) can help the rug lie perfectly flat and define the oval shape more clearly.
Crocheting an oval cottage rug is a beginner‑friendly project that teaches how to work in the round, manage increases, and adjust size while creating something practical for your home. By starting from a short center chain, building an oval with regular increases at each end, and continuing rounds until you reach the size you want, you can customize a cozy rug for any room.
If you prefer you can whatch the video of this tutorial:
How comfortable do you feel now about the idea of working around a starting chain to form an oval—could you describe which part of the rug (sides or ends) needs the increases and why?
Best Amigurumi Patterns for Beginners 2026 – 10 Free & Easy Tutorials
Amigurumi, the Japanese art of crocheting adorable stuffed toys, has captured the hearts of crafters worldwide. If you’re wondering where to start with amigurumi crochet for beginners, you’ve come to the perfect place.
The Aveline Rug – Simple Yet Stunning Crochet Tutorial with Free Pattern
The Aveline Rug is a beautiful circular crochet rug pattern that combines simple double crochet rounds with decorative bead stitches and textured edging.
Easy Oval Cottage Rug – Step‑by‑Step Crochet Tutorial for Beginners
An oval cottage rug is a great beginner project that looks impressive but uses very simple stitches. This tutorial walks through each step to crochet an oval rug from the center outward, so you can make it smaller for a bedside rug or larger for an entryway, hallway, or kitchen. The method is based on […]