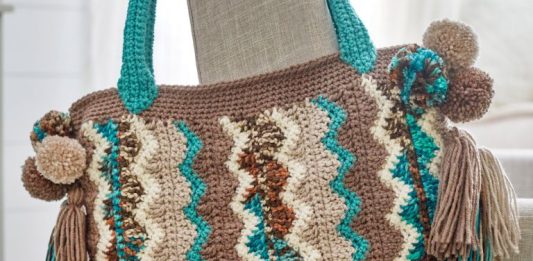
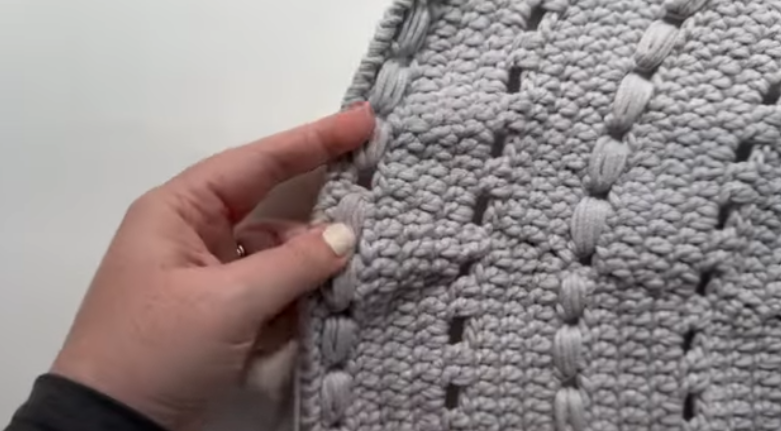
Free Pattern: Stunning Crochet Bag With Flame Stitches
Step into the realm of crochet artistry where imagination weaves vibrant patterns into existence. We invites you to explore the fusion of technique and creativity. This guide serves as your portal to crafting a dazzling crochet bag adorned with mesmerizing flame stitches.
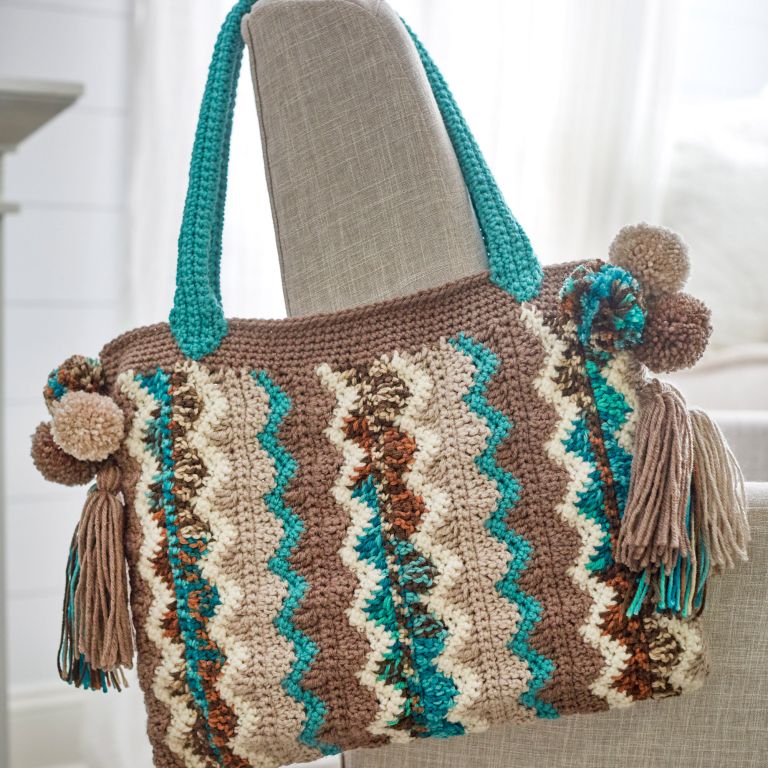
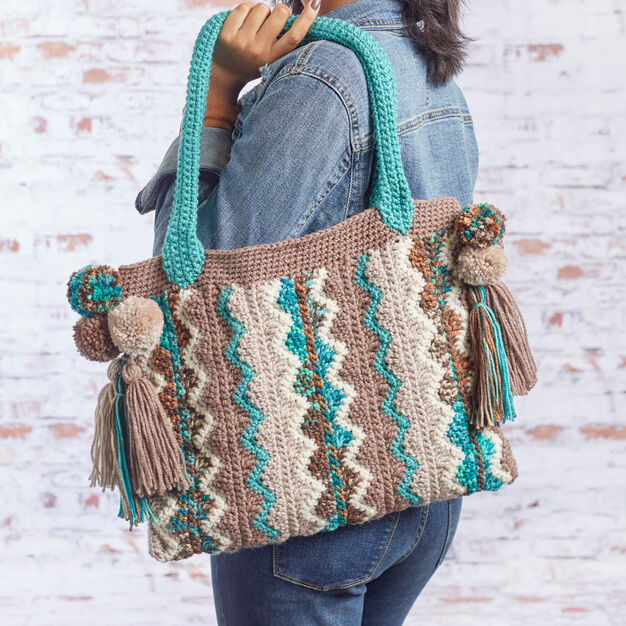
Ignite your crochet journey with our free pattern for a stunning crochet bag featuring captivating flame stitches.
It’s great to be here with all of you, and I’m thrilled to be able to share my love of crochet by providing free crochet patterns with complete walkthroughs.
Each week, I’ll post a new pattern or design, and today’s is this fantastic crochet bag – perfect for everyday use. I’m so passionate about this pattern and I’m getting more excited about it every day. I’m so glad that I was able to find the complete pattern and I’m thrilled to be able to share it with all of you for free. That’s what makes crochet so amazing – we can exchange wonderful experiences and creations made with crochet.
Here, I’m providing you all with step-by-step instructions to have a blast making this awesome bag. Be aware that this project takes a considerable amount of effort and dedication, but the payoff is definitely worth it in the end. I hope you found this helpful and I encourage all of you crochet lovers to give it a shot and share your results with the world!
Materials:
- I ball of Red Heart Super Saver or equivalent size 4 yarn in each of your 5 favorite colors. (5 balls in total)
- Crochet hook US size H-8 (5 mm)
- PomPom Makers for 2 and 3 inch pompoms
- One sewn 18mm magnetic fitting
- Sewing needle and thread
- 7-8 ″ of heavy cardboard for tasseling
- Sewing needle
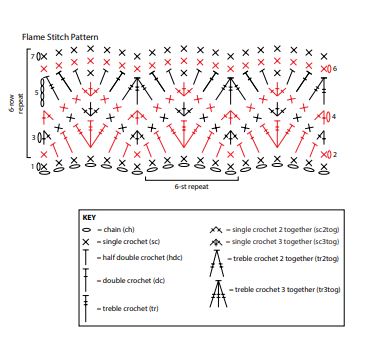
flame stitch Crochet
For this crochet bag, simply follow the pattern shown in the graphic to create it.
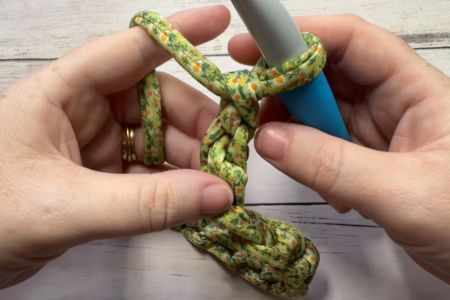
BODY
With A, ch 80 loosely. Row 1 (wrong side): Sc in 2nd ch from hook and in each ch across—79 sc.
Row 2 (right side): With A, ch 1, turn, sc in first st, *hdc in next st, dc in next st, 3 tr in next st, dc in next st, hdc in next st, sc in next st; repeat from * across;change to B in last st.
Rows 3 and 4: With B, ch 1, turn, sc2tog, sc in next 2 sts, *3 sc in next st, sc in next 2 sts, sc3tog, sc in next 2 sts; repeat from * to last 5 sts, 3 sc in next st, sc in next 2 sts, sc2tog; change to C in ast st of Row 4.
Row 5: With C, ch 4, turn, skip first st, tr in next st (beginning ch-4 and following tr count as tr2tog), dc in next st, hdc in next st, *sc in next st, hdc in next st, dc in next st, tr3tog, dc in next st, hdc in next st; repeat from * to last 5 sts, sc in next st, hdc in next st, dc in next st, tr2tog.
Rows 6 and 7: With C, ch 1, turn, sc in each st across.
Row 8: With C, repeat Row 2; change to B in last st.
Rows 9 and 10: With B, repeat Rows 3 and 4; change to D in last st of Row 10.
Rows 11-13: With D, repeat Rows 5– 7 .
Row 14: With D, repeat Row 2; change t o E in last st.
Rows 15 and 16: With E, repeat Rows 3 and 4; change to A in last st of Row 16.
Rows 17–19: With A, repeat Rows 5– 7 . Rows 20-37: Repeat Rows 2-19. Rows 38-48: Repeat Rows 2-12. Fasten off.
Free Pattern
POMPOMS Make as many pompoms as desired using yarn colors of your choice. Following package instructions make 2″ [5 cm] and 3″ [7.5 cm] pompoms. Leave ends of pompom tie for attaching pompom to bag.
TASSELS Make as many tassels as desired using yarn colors of your choice. Wrap yarn color of your choice about 20 times around 7-8″ [18-20.5 cm] piece of heavy cardboard. Thread a 14-16″ [35.5- 40.5 cm] length of yarn under the top of the wraps and tie into a tight knot for top of tassel. Do not cut ends of tie, leave ends for attaching tassel to bag. Slip wraps off of cardboard. Tie a 14-16″ [35.5-40.5 cm] length of yarn around wraps about ¾-1″ [19-25 mm] from top for tassel neck. Wrap ends of tie around wraps several times and then draw ends to inside of tassel. Cut the lower ends of the wraps and trim to even.
CROCHET 1
FINISHING Weave in ends on wrong side of bod y. Fold body of bag in half and sew side edges togethe r . Top Band With right side facing, join A with slip st in the top of one of the side seams.
Round 1: Ch 1, work sc evenly spaced all the way around top edge of body; join with slip st in first sc.
Rounds 2–6: Ch 1, sc in each sc around; join with slip st in first sc. Fasten off. Using photograph as a guide, sew ends of handles to outside of top band. Tie pompoms and tassels to top corners of bag. Sew magnetic closure to inside center of top band. Weave in any remaining ends.
Inspired on a pattern published by yarnspirations.com. You can download this tutorial here: yarn_crochet.
Best Amigurumi Patterns for Beginners 2026 – 10 Free & Easy Tutorials
Amigurumi, the Japanese art of crocheting adorable stuffed toys, has captured the hearts of crafters worldwide. If you’re wondering where to start with amigurumi crochet for beginners, you’ve come to the perfect place.
The Aveline Rug – Simple Yet Stunning Crochet Tutorial with Free Pattern
The Aveline Rug is a beautiful circular crochet rug pattern that combines simple double crochet rounds with decorative bead stitches and textured edging.
Easy Oval Cottage Rug – Step‑by‑Step Crochet Tutorial for Beginners
An oval cottage rug is a great beginner project that looks impressive but uses very simple stitches. This tutorial walks through each step to crochet an oval rug from the center outward, so you can make it smaller for a bedside rug or larger for an entryway, hallway, or kitchen. The method is based on […]