Persian Tiles extension Blanket – Free crochet Pattern
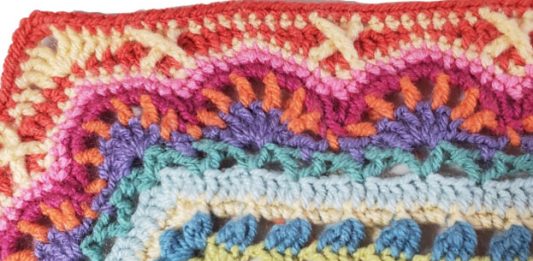
This persian extension blanket is a beautiful addition to any home. Its vibrant colors and exquisite design will make it a fantastic gift for any occasion. The recipient will be delighted with your thoughtful gift.
Persian tile blankets are always in fashion and any home that likes to crochet should certainly have one to decorate their rooms.
We will provide a beautiful pattern on this page for you to make your own Persian tile blanket.
This project is a beautiful throw blanket with many different colors, motifs and elements. I’m really pleased with how it turned out and wanted to share it with you.
The yarn suggested for making this blanket is Stylecraft Special Double Knit. It’s a free pattern that can be easily accessed from my post.
This pattern is adapted from Jane Crowfoot’s original design for Persian Tiles.
It assumes you already know the abbreviations. I always start with standing stiches and close with a hidden stitch. I have direct permission to publish this pattern from Janie Crowfoot as I am offering it for free and it does not include any instructions for the main pattern.
Please keep in mind that I am a newbie to actually writing down my patterns. If you find any mistakes, please let me know. I did not count stitches until it came to the V stitches as I needed a specific amount to create the mini fans. In the chart you will see an odd symbol.
I used a free program to produce it and I could not find a triple crochet 2 together!
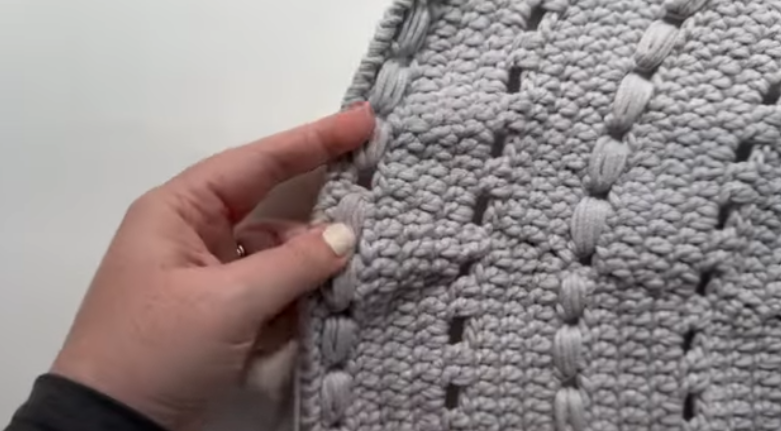
Round 8 of crocheting a persian blanket
Round 3: 3.5mm hook, Dc3tog, ch3, dc3tog in the corner. Dc3tog in the next 3 st. *Ch 3, dc3tog in the next 3 st until the corner. Dc3tog in the corner 3 st from rd 2.*
Round 4: 2sc, ch2, 2sc in the corner. Fpsc around the 3dc2tog from round 3. 3sc in the next ch3 sp. Sc around the 3dc2tog from round 3. Repeat until the next corner.
Round 5: Corner, 2dc ch2, 2dc in the corner. * Sk 3 st, v st in the next stitch, Dc ch 2, dc in the next corner* There should be 60 v stitches per side.
Round 6: Beginning fan. In the corner sp, hdc, ch1, dc ch 1 x’s 4, hdc. 1sc in the first v st. *ch 3, hdc, ch1, dc ch 1 x’s 4, hdc in the next v st. Ch 3 1 sc in the next v st , ch 3 1sc in the next v st, hdc, ch1, dc ch 1 x’s 4, hdc in the next v st. * You should have 20 start fans on each side and 4 corner fans.
Round 7: Ending Fan. In the corner fan, start with 1 hdc in the first st, ch 2, 1 dc, ch2, in the next 4 st, hdc in the next stitch. Ch1, 1sc in the 1st ch3 sp. 1 hdc in the first st, ch 2, 1 dc, ch2, in the next 4 st, hdc in the next stitch. * Ch1, 1sc in the center ch sp, ch 1, 1 hdc in the first st, ch 2, 1 dc, ch2, in the next 4 st, hdc in the next stitch.*
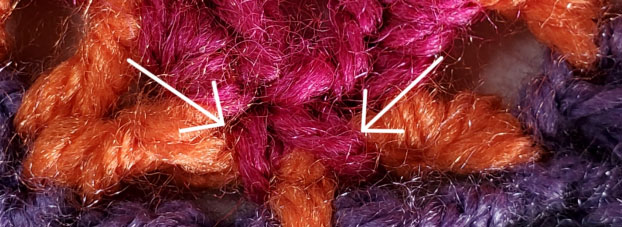
Round 8: 4mm hook. Start in the 3rd ch2 sp in the corner fan with 1 standing sc followed by 3 more sc (4 total). Sk the next st, 3sc in the next ch2 sp, sk the next st, 3sc in the next ch 2 sp. Sc2tog between the last hdc from round 7 and the next hdc. *3sc in the next 2 ch2 sp, 3 sc in the next ch2 sp, 3 sc in the next ch2 sp. Sc2tog on either side if the ch3 sp from round 7.* On the last fan before the corner, sc2tog on either side of the sc from round 7.
Round 9: *Starting in the 3rd sc on the corner fan, standing sc followed by 2sc (3 total). Sc in the next 6 st, sk 4 st, sc in the next 6 st, 3sc in the next st.*
Round 10: * 1 standing sc in the second of the 3 sc at the top of any fan, 6sc in the next 6 st. Skip 2 st, 7 sc in the next 7 st. (One sc on the top of each fan and 6 sc on either side. *
Round 11: Starting from a corner fan on the 1st st before the 7th st on round 10, make a standing sc. Slip st (loosely) in the next st, sc in the next st. Hdc in the next st, 2 dc in the next 2 st. Tc2tog over the next 2 st, tc2tog over the next 2 st (that will cover the valley 4 st,) dc in the next 2 st, hdc in the next st, sc in the next st, slip st into the top st (loosely). * sc in the next st , hdc in the next st, 2 dc in the next 2 st, tc2tog in the next 2 st, tc2tog in the next 2 st, 2 dc in the next 2 st, hdc in the next st, sc in the next st, slip st in the next st.*
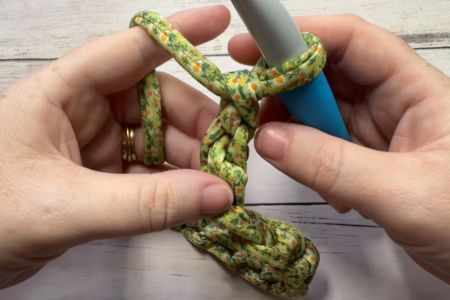
Round 12
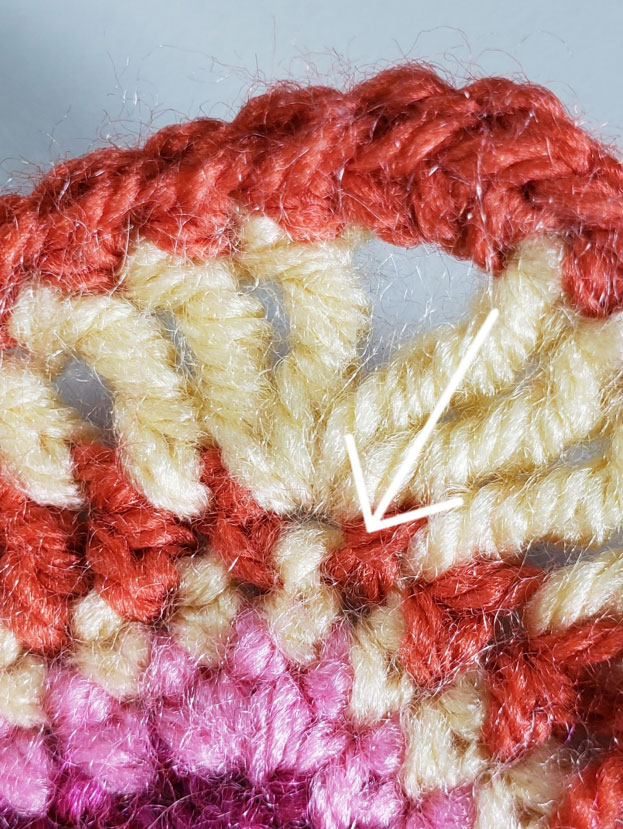
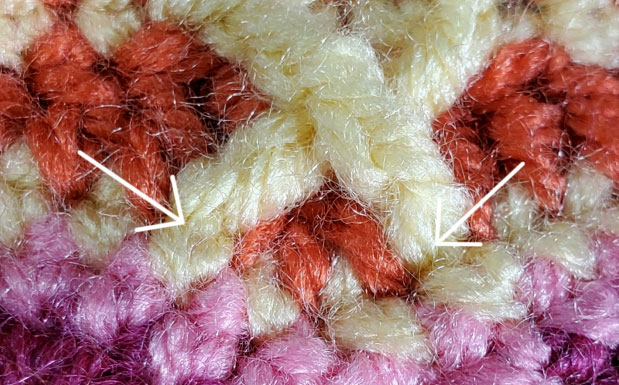
Round 12: Starting in the slip st on any corner, standing tc, followed by another tc. Ch2, 2 tc all in the corner slip st. 1tc in the next st, 2dc in the next st. Fptc around the 2nd st on the left from the valley of round 10 as in Jane’s original pattern. Sk a stitch, hdc in the next st, sc in the next st, fptc around the the 2nd st on the right in the valley of round 10.
Skip a stitch. That is the corner made. *Sc in the next 7 st, Fptc around the 2nd st on the left from the valley of round 10 as in Jane’s original pattern. Sk a stitch, sc in the next 7 st.”
Round 13
Round 13: *Starting in a corner ch2 sp, make a standing sc followed by 2 sc (3 total). Sc in every st until the next corner.*
Repeat as many times as you like! Thanks for playing and happy hooking!
![]()
You cand download below the PDF of the free pattern where you can follow to crochet this persian blanket.
Persian tiles border chart PDF
We hope you have enjoied our tutorial. We have more blanket free patterns on our website. Take a look at our pages!
This crochet pattern is not exactly a blanket but an extension of a blanket. However, we do have real blanket crochet patterns on our website.
Best Amigurumi Patterns for Beginners 2026 – 10 Free & Easy Tutorials
Amigurumi, the Japanese art of crocheting adorable stuffed toys, has captured the hearts of crafters worldwide. If you’re wondering where to start with amigurumi crochet for beginners, you’ve come to the perfect place.
The Aveline Rug – Simple Yet Stunning Crochet Tutorial with Free Pattern
The Aveline Rug is a beautiful circular crochet rug pattern that combines simple double crochet rounds with decorative bead stitches and textured edging.
Easy Oval Cottage Rug – Step‑by‑Step Crochet Tutorial for Beginners
An oval cottage rug is a great beginner project that looks impressive but uses very simple stitches. This tutorial walks through each step to crochet an oval rug from the center outward, so you can make it smaller for a bedside rug or larger for an entryway, hallway, or kitchen. The method is based on […]