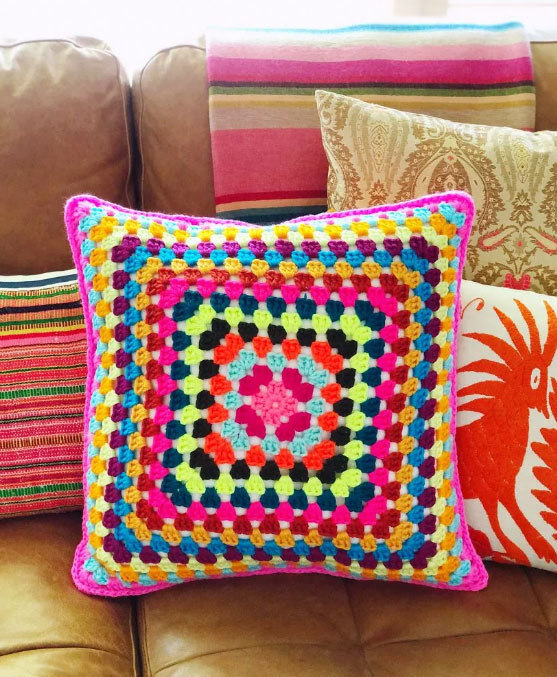
Make a Crocheted Granny Square Pillow Cover
Transform your space with a touch of handmade charm using our granny square pillow cover crochet tutorial!
Create a cozy and decorative crocheted granny square pillow cover with our step-by-step guide
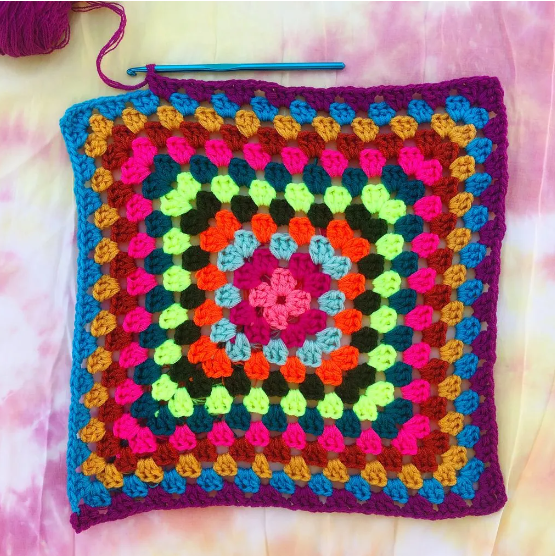
Here at Crochet and Love, we have an undeniable enthusiasm for crochet granny squares. They evoke nostalgia, are timeless, and are full of fun and exciting color combinations.
We have seen the resurgence of crochet in fashion, with brands like The Series and Free People using a modern take on this classic look. Additionally, celebrities such as Busy Philipps have helped to build the popularity of crochet granny squares.
Crafting an entire sweater or blanket with granny squares can seem overwhelming and time-consuming for a beginner project. Don’t let that stop you from exploring Granny Land, though!

Start with this easy granny square throw pillow, which uses just two large granny squares and a single crochet border to join them together.
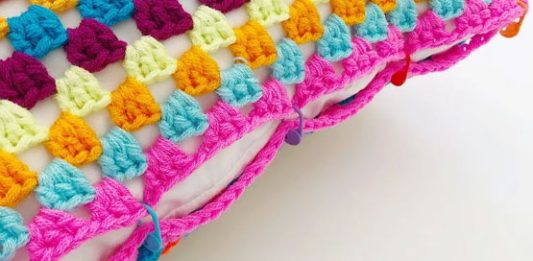
Cushion cover made of crochet
In our opinion, this project presents an amazing opportunity to create a bold and striking color combination! You can choose to alternate colors, use color blocks, create an ombré design, or even make a rainbow.
We used a mix of neons, pastels, and jewel tones, which was a nod to the three crochet kit colorways. We used Omegacryl yarn, pulling from the center and exterior tails at the same time, but you can also opt for worsted weight or any other yarn of your choice.
Make sure to match your hook size to your yarn thickness; for this project, we suggest a 5mm Size H hook.
Without any further delay, let us begin our grannying! (That is an action verb! 😝)
Materials
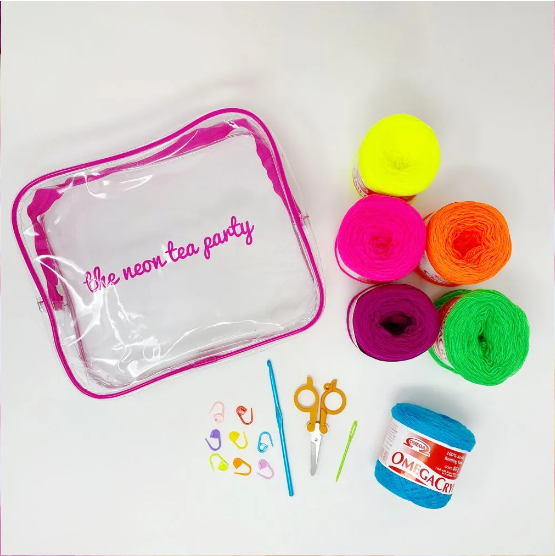
materials
For crocheting this crochet pillow we will need:
- Omegacryl or your choice of yarn
- A crochet hook to match your yarn weight – we’re using a 5mm Size H* in this tutorial
- Stitch markers
- Snips/scissors
- Yarn needle
- Pillow insert

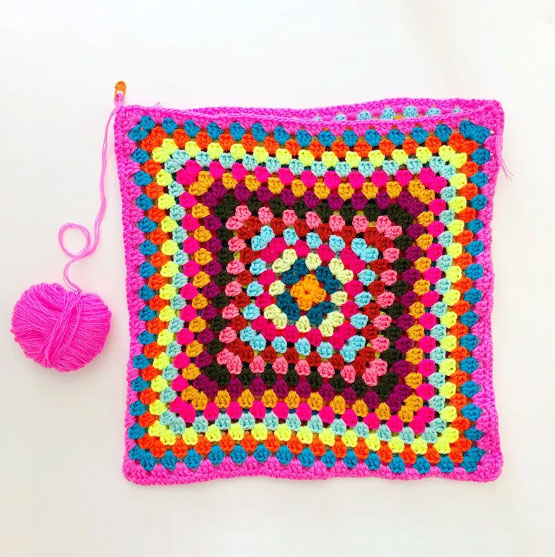
Crochet Pillow – Front and back
The main part of this project is constructing the two big granny squares. If you are new to crocheting granny squares, you can watch this video tutorial and follow the pattern.
Ensure that the pillow insert is almost the same size as the granny squares for fluffiness. If you want to use different color patterns for the two squares, it is best to end both with the same color on the outside for a seamless look.
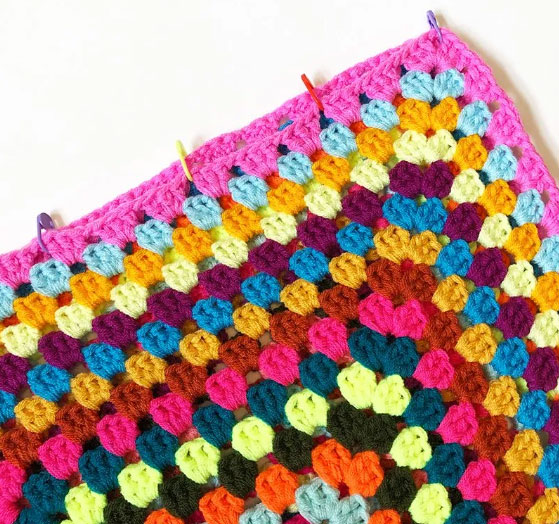
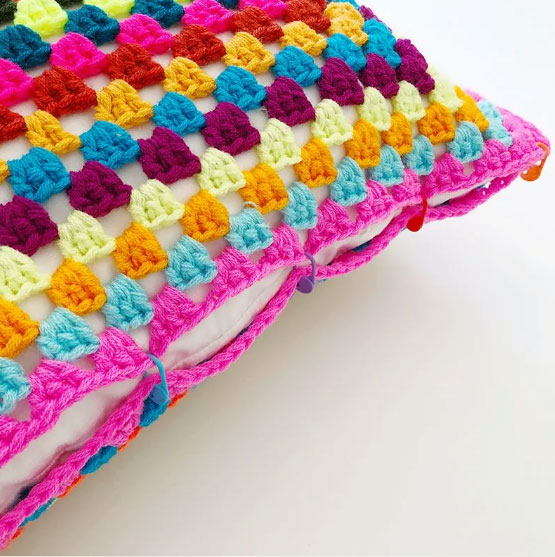
Details of the crocheted pillow
Once your squares are complete, it’s time to join them! Place one on top of the other with the wrong sides facing one another. Next, match up the holes around the outermost row and place stitch markers periodically in the holes around the edges to keep the squares matched up.
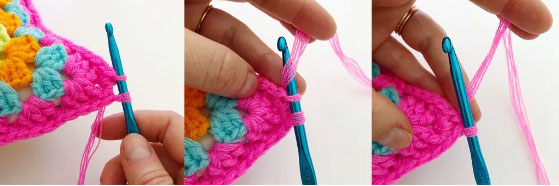
Next you’ll begin joining the two squares together with a single crochet stitch. Choose your border yarn color and attach it to your hook with a slip-knot.
If you want a seamless border like our example here, use the same yarn as the last row of both of your squares. If you’re using Omegacryl, double up your ends, pulling from both the interior and exterior tails to make your slipknot.
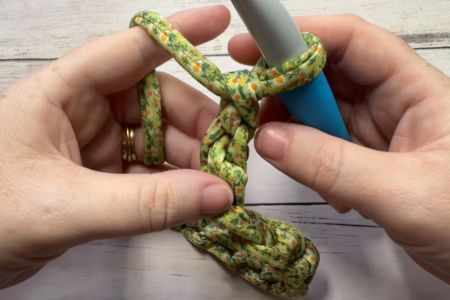
How to single crochet your grannies together
To join your Granny Squares together with a single crochet stitch, start by lining up the two squares you wish to join. Make sure the right side of the fabric is facing outwards. Insert your crochet hook into the corner space of the first square.
Pull up a loop, and then insert your hook into the corner space of the second square and pull up another loop.
Yarn over and draw through both loops on your hook. Continue to single crochet around the outside edge of the squares, joining them together. When you reach the end, fasten off your work and weave in the ends.
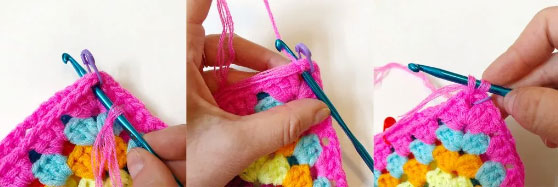
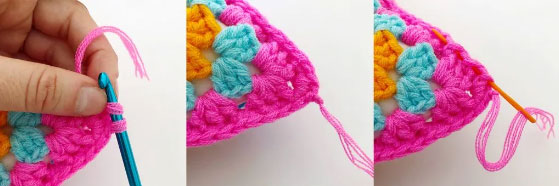
Step 1
Begin in the corner where both granny squares meet. Using the attached yarn, insert your crochet hook into both squares simultaneously. Yarn over and draw the thread through the corner, resulting in two loops on your hook.
Step 2
Repeat by yarning over and pulling through both loops on your crochet hook.
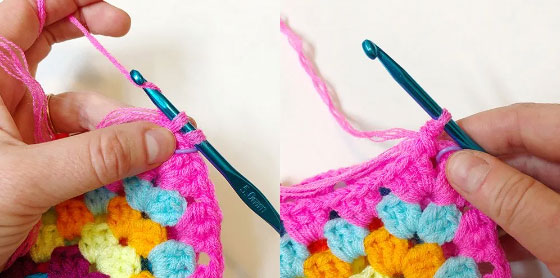
Step 3
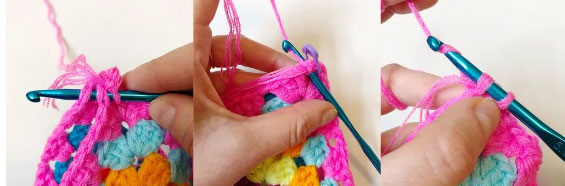
It is now time to single crochet underneath your first set of stitches. To ensure that the grannies are properly aligned, insert your hook underneath the top V-shape of the first stitch next to the corner on both grannies (as seen in the first photo).
Yarn over and pull the yarn under the two Vs, then yarn over again and pull through the two loops on your hook.
Continue this process for each matching pair of stitches along the edge of your granny square pair.
Make sure to keep the stitches as close as possible, but if any issues come up, you can always make an extra stitch in the next hole. In most cases, however, you will only need a single stitch in the hole.
Step 5
At the next corner, work two single crochets, then repeat when you come to the following two corners. Once you have finished three sides of the shape, cease crocheting and leave one side open.
Step 6
Insert the pillow into your granny square casing and line up the edges with stitch markers. Securely stitch the pillow until you reach the starting corner.
At the corner, make two single crochets, the first one being the one you began the stitching with and the second one the one you end with.
This will ensure the pillow does not slip out. (Note: In the picture there are three single crochets because of our mistake. This should be a learning opportunity for you!)
Step 7
To finish your pillow, take the starting and ending stitches and secure them together. Insert your hook into the starting stitch while the loop of the ending stitch is still on the hook. Yarn over and pull through both loops.
Step 8
Snip your yarn, leaving a 3-4 inch tail. Secure the tail by looping it over your hook and pulling through the one loop on it, forming a knot.
Now, to hide the tail, take your yarn needle and weave it into the border of the pillow. After that, trim off any remaining yarn.
Step 9
Congratulations on completing your first crochet granny square throw pillow! With this modern, thrifty project, you can bring a touch of style to your home. We hope that this simple project has given you the confidence to continue on to more complex projects. Welcome to the granny party!

Join our free whatsapp group for more Crochet
Best Amigurumi Patterns for Beginners 2026 – 10 Free & Easy Tutorials
Amigurumi, the Japanese art of crocheting adorable stuffed toys, has captured the hearts of crafters worldwide. If you’re wondering where to start with amigurumi crochet for beginners, you’ve come to the perfect place.
The Aveline Rug – Simple Yet Stunning Crochet Tutorial with Free Pattern
The Aveline Rug is a beautiful circular crochet rug pattern that combines simple double crochet rounds with decorative bead stitches and textured edging.
Easy Oval Cottage Rug – Step‑by‑Step Crochet Tutorial for Beginners
An oval cottage rug is a great beginner project that looks impressive but uses very simple stitches. This tutorial walks through each step to crochet an oval rug from the center outward, so you can make it smaller for a bedside rug or larger for an entryway, hallway, or kitchen. The method is based on […]